 Skip to content
Configure Travel management software to setup an approval workflow for travel requests and customize the generation of Travel Request IDs.
To configure Travel module settings, you need to:
- Log in as HR Manager / HR Admin.
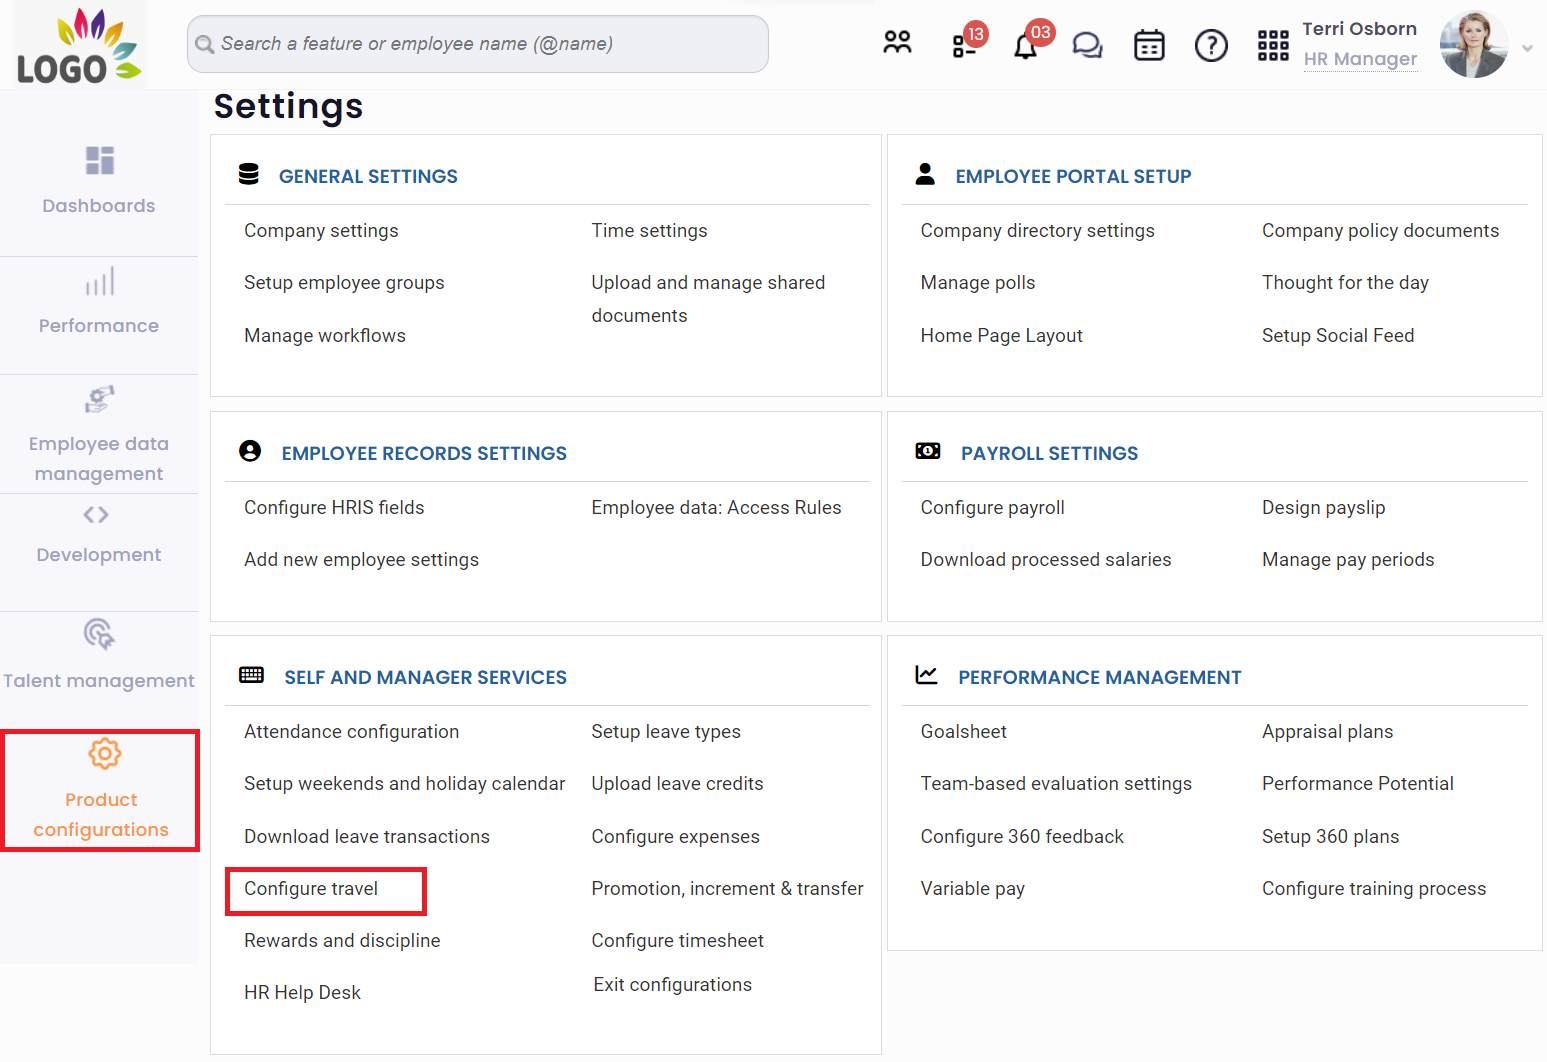
- On the Dashboards homepage, click Product configurations. Go to Self and manager services and click Configure Travel as shown in Figure 1.

Figure 1
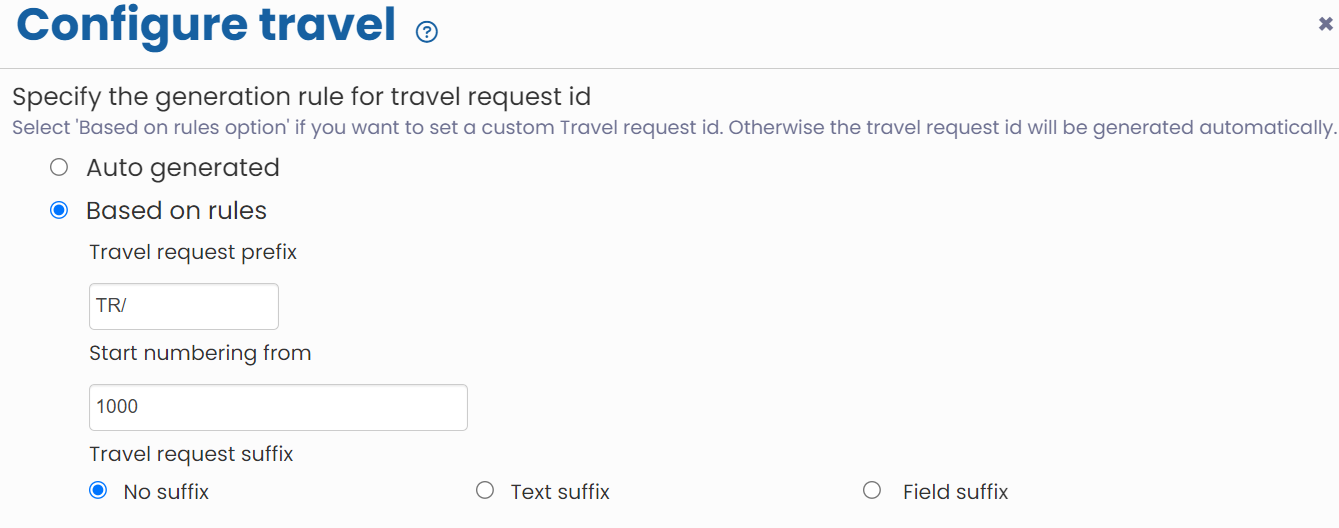
- The Configure Travel page appears as shown in Figure 2. Setup rules for managing travel requests. The section allows you to configure the generation of request id with a prefix and suffix, the approval workflow when different employees create a travel request on behalf of an employee.
- Select an option for Specify the generation rule for travel request id. Select Based on rules if you want to set custom Travel Request ID, else the travel request id will be generated automatically.

Figure 2
The custom travel id creation fields appear on the page.
- Provide the prefix that you want to use in the travel request id in Travel Request Prefix field.
- Provide the number from which you want to start the generation of travel request id in Start numbering from field.
- Select the type of suffix that you want to use in travel request id from Travel Request Suffix options field. The available options are:
- No Suffix: No suffix will be used in travel request id.
- Text Suffix: You will be allowed to provide the text that you want to use as suffix in travel request id.
- Field Suffix: You will be allowed to select the field that you want to use as suffix in travel request id. You can select employee number, department or location of the employee as suffix.
For example, if you provide TR in Travel Request Prefix field and 111 in Start numbering from field, select Field Suffix option in Travel Request Suffix field and then select department from the Field dropdown then the travel request Id generated for travel requests for an employee from Human Resources department would be TR111Human Resources, TR112Human Resources, TR113Human Resources.
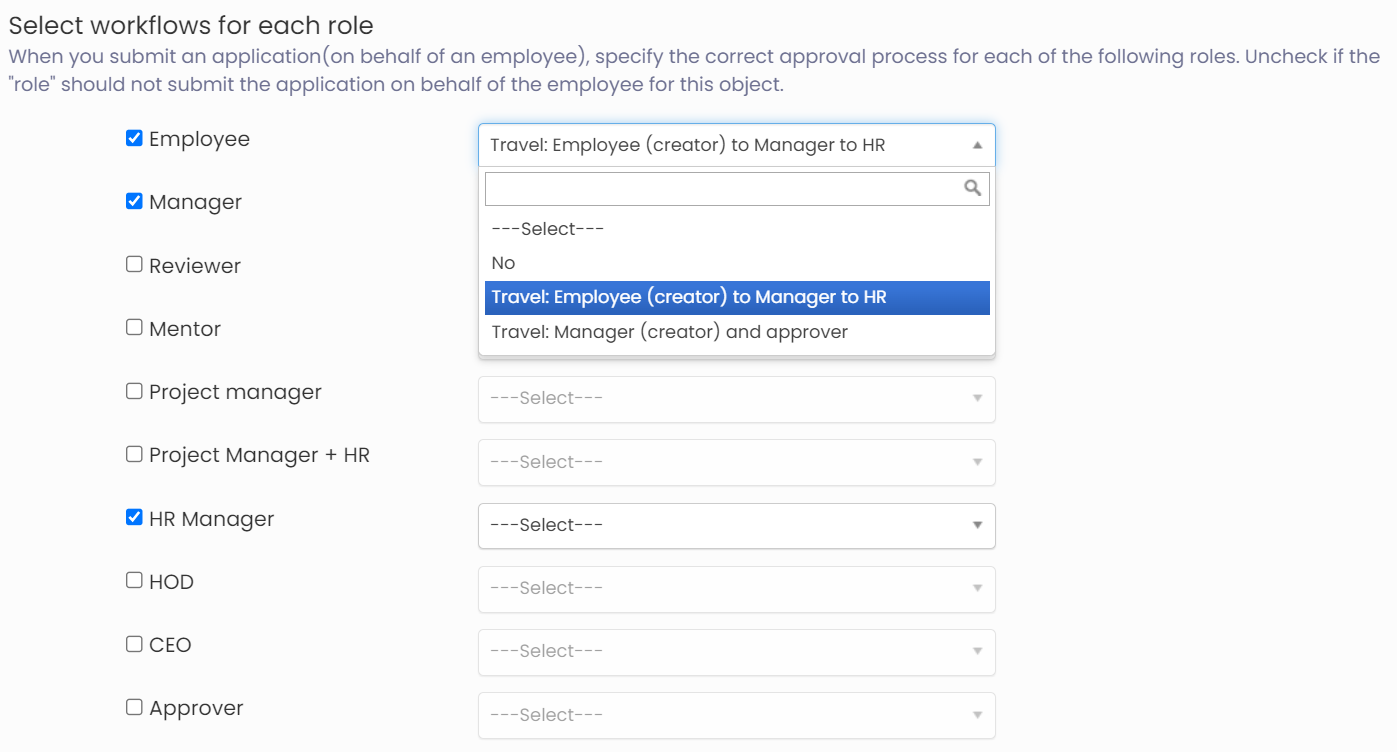
- Configure the workflow to be used for each user in the Specify workflows for each role (as shown in Figure 3). The workflow dropdown appears for each role. For example, if you select Emp To mgr To HRM option from the Workflow dropdown for employee, then when an employee creates a travel request, the request would be approved by the manager and then by the HR manager.
- Select/ deselect the view checkbox for each role to provide view permissions to the user. The edit permissions can only be given to users who have view rights.

Figure 3
- Select the appropriate workflow for the travel request approval for the users from the corresponding dropdown. The available options are:
- No: Allows you deny edit rights to the user.
- Emp to Manager to HR: Employees’ travel request to be approved by the manager and then by HR.
- Mgr to approver: Allows the manager to create a travel request on behalf of a subordinate and then send it to approver or HR manager for approval.
Configure the permissions for all the users in the same manner.
- No: Allows you deny edit rights to the user.
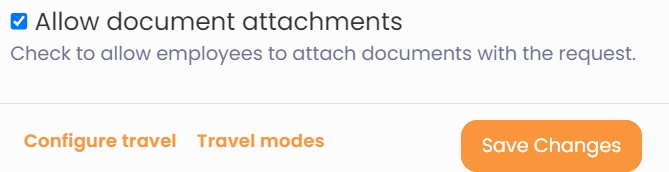
- Select Allow document attachments checkbox to allow employees to attach documents (such as bills and receipts) with the travel request as a proof of travel.

Figure 4
- Click Save Changes to save the configuration changes you have made to the sub-module. The travel configurations are saved successfully and a message suggesting the same appears.
Learn more about Empxtrack Travel and Expense
Click on each of the following links to know more about them:


